Monday, December 31, 2012

Bring on the New Year!

So, we survived Christmas 2012!  This was the first Christmas I didn't spend with my family and it was different, but just as fun.  I have found now that I have a little one of my own, it doesn't matter where you are, Santa always finds you! 

With the holidays comes tons of baking and cooking loads of comfort foods!  Instead of me attempting to be a good blogger, I am going to put a few recipes all on this post.  Shoot me...I never said I would be great at this whole blogging thing.  ;)

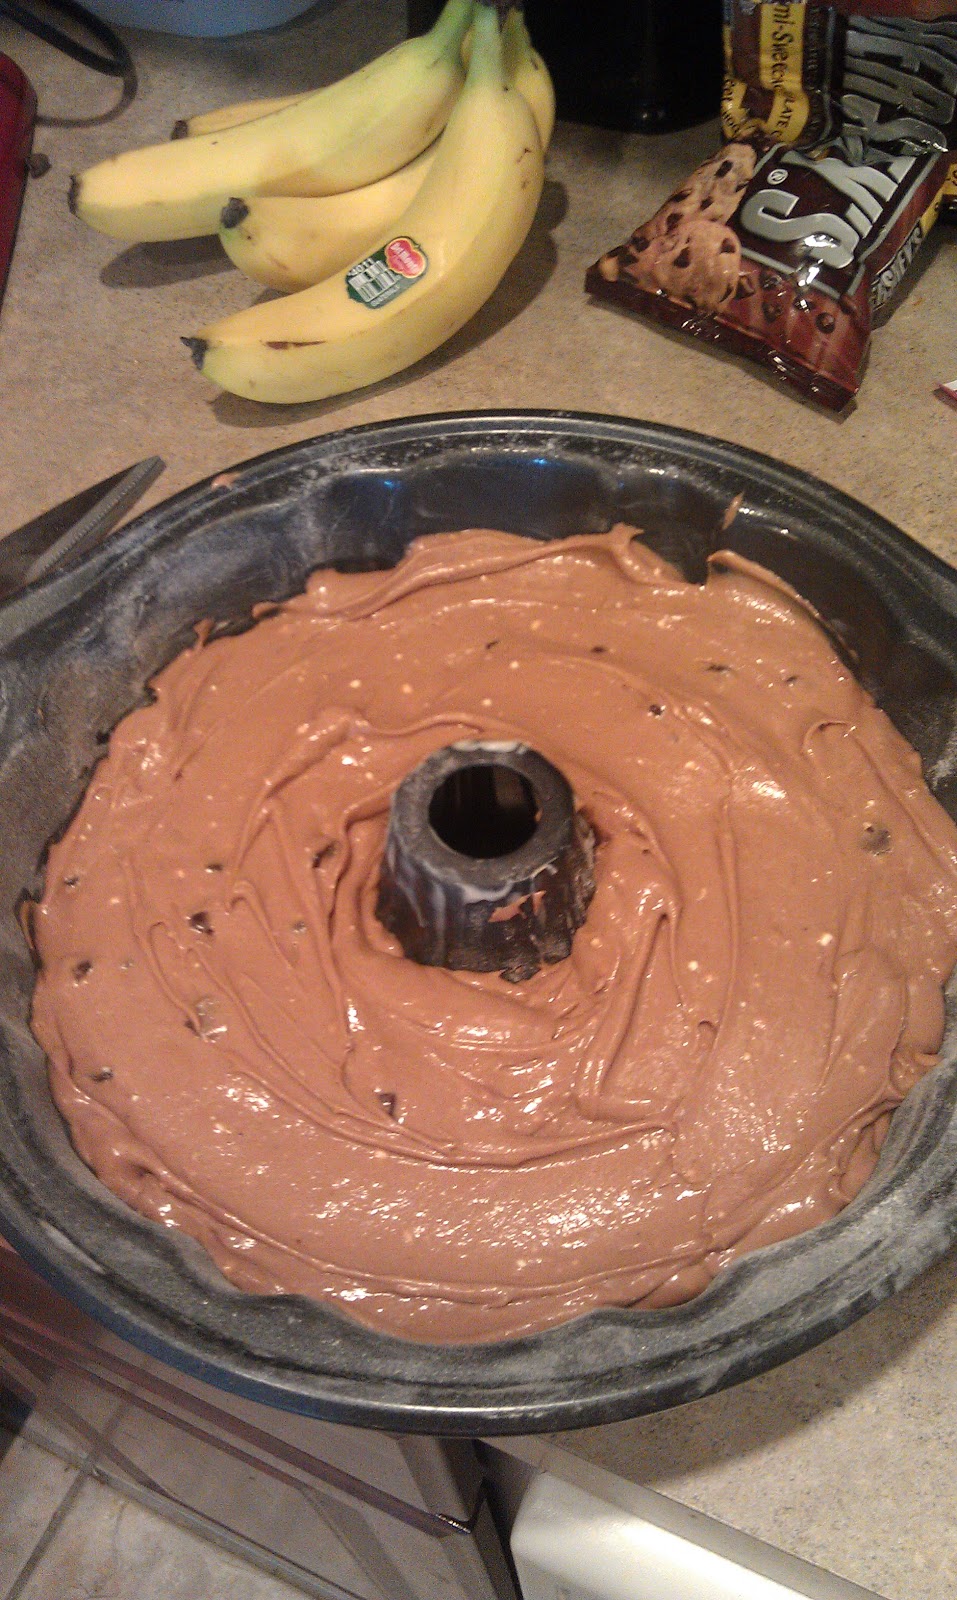
SOOO, let's talk chocolate pound cake!!!  Bet I got your attention with that, now didn't I?  I got this recipe from a Paula Deen cookbook a few years ago.  It is worth every calorie....seriously!

Chocolate Chip Pound Cake
4 eggs
1-1/2 cups water
1 teaspoon vanilla extract
1 package butter recipe cake mix
1  3.4 oz. pkg. instant vanilla pudding mix
1 3.4 oz. pkg. instant chocolate pudding mix
1 stick melted butter
1/4 cup vegetable oil
6-ounces chocolate chips
Powdered sugar for dusting

Preheat oven to 350F. Grease and flour a tube pan or bundt pan. In a mixing bowl, beat the eggs, water, and vanilla on low. Stir in the cake mix and pudding mixes. Slowly add the butter and oil, and mix well.


Stir in the chocolate chips. Pour into the prepared pan.
 
 
 Bake for 50-60 mins. Cool for 10 minutes, then invert onto a cake plate. Sift powdered sugar over the cake, or drizzle with chocolate sauce, if desired.


Ahhh, chicken and dumplin's how I love thee!  Nothing says comfort food like a big ol' bowl of steamy chicken and dumplin's.  Fluffy dumplin's and a ever slightly salty and peppery broth makes this one of our family's favorite winter meals.  The hubs won't eat chicken and dumplins if the temp rises above 70 degrees.  Now, since he is gone the majority of the time little man and I will whip up a batch every now and then in the spring and fall.  The secret to this recipe is NOT to stir the pot a bunch.  It breaks down the starch and can make the dumplings kinda gummy.


Chicken and Dumplin's
1 1/2 cup cooked chicken, chopped or shredded
butter
1 small onion, chopped
celery, chopped
carrot, chopped
1 32 oz. carton low-sodium chicken broth or (24oz. chicken broth and 1 1/2 cups water)
1/2 tsp. poultry seasoning
black pepper to taste
1 5-biscuit can
1/4-1/2 cup chicken gravy
 
In a dutch oven, melt butter and saute onions, carrots, and celery (approx. 10 mins). 
Add broth, poultry seasoning, pepper and chicken.  Bring to a boil.  Reduce heat and simmer for 30 mins.
 
On a flat surface, dust with flour and press biscuits approximately 1/4" thick.  Cut into even strips about 1" wide with a pizza cutter.
 
Skim off any fat from from your broth mixture.  Stir in chicken gravy.  Drop dumplings into pot a few at a time.  Slowly stir them all in and cover with a tight lid.  Simmer for 10 more minutes.  If not thick enough, mix 1 Tbs. cornstarch with cold water and slowly pour into pot.  Stir.  It will thicken. 
Sorry I was so hungry I forgot to take a pic of the final product.  :)  Guess you will just have to make it to see!!!
 

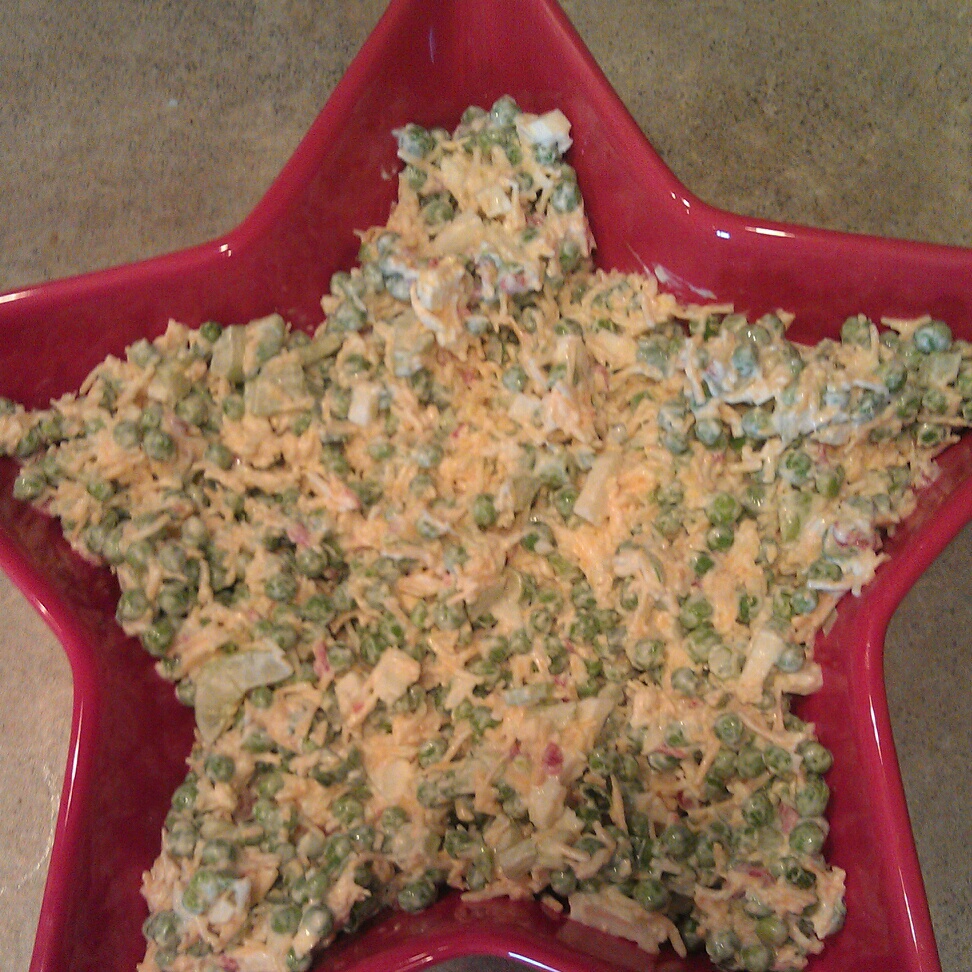
We always have the same menu for Christmas supper... a spiral sliced Ham (except for this year it is always a Honeybaked Ham), broccoli cheese rice casserole, pea salad, and Parker house rolls.  Now, we usually rotate mac & cheese, scalloped potatoes, mashed potatoes or sweet potato casserole for our starch to round out our feast!  This year I made broccoli cheese casserole and I have to say it was as good as Mama's (and that is saying a lot!).  I forgot to take pics of the broccoli casserole, so I will post the recipe next time I make it unless one of you posts that you would like for me to share it sooner!  But....I did take pics of the pea salad.  It's one of the hubs favorite things to eat.  The best thing is, it is SUPER easy to make!

Mama's Pea Salad
 
1 16 oz. bag frozen baby/petite peas
4 green onions, sliced thin
¾ to 1 cup diced celery
2-3 hard boiled eggs, chopped
¾ to 1 cup mayonnaise
1 jar diced pimentos, drained well
1 8 oz. bag shredded cheese (we use Co-Jack)
 
Mix all ingredients in a bowl and let it set for at least 8 hours (overnight is even better).  Serve.


As we wrap up 2012, I wish all y'all the very best in 2013.  May the new year be better than you ever wished for!

Monday, November 19, 2012

I'm Back!!!!

Soooo it has been forever since my last post.  I have been running around like a crazy person down here!  I have been studying like a mad woman, had a birthday, had family portraits taken (good Lord I need to invest in airbrush makeup), enrolled Little Man into karate and got ACCEPTED into nursing school!  WHOOP!  WHOOP!  So, as you see, no rest for the weary!  Ooh, I forgot to mention it has FINALLY started to cool off here in South Texas.  Although, we hit a record of 90 degrees on my birthday, which is November 11th.  Crazy, right?  As I celebrated breaking out a couple of long sleeve tops, I decided we had waited long enough to start making "cold weather" food.  So, what better dish to kick off the cooler weather than Creamy Potato Soup. Thank you baby Jesus for potato soup!  I probably could eat this at least once a week.  Along with cooler weather comes the beginning of holiday events. Being that it is close to Thanksgiving, Little Man's pre-K class had their Thanksgiving feast last Thursday.  Since I obviously have plenty of time on my hands, I signed us up for dessert.  I didn't want to do a pie, so I decided to do something a little more creative.  I got the idea to create sugar cone cornucopias from Pinterest.  So, I will show that below as well!  So, I guess I should correct myself and say "Thank you baby Jesus for potato soup and Pinterest!!!  Let's talk potato soup first.  I have worked this recipe over and tweaked it to my taste.  I hope you find it as comforting as I do!

Creamy Potato Soup

4 cups cubed potatoes (red)
1 cup chopped onion
1 cup celery (I use the frawns/leaves at the top of the stalk too)
64 oz. chicken stock (I use 32 oz. low sodium & 32 oz. regular)
Pepper to taste
1 Tbs. seasoned salt
1 Tbs. dry parsley
1 stick of butter
1 cup flour
2 cups half & half
shredded cheese (4-6 oz)

In a dutch oven, combine first 7 ingredients. Bring to a boil and simmer 15 mins or until veggies are tender.


In a small saucepan, melt butter and add flout to make a roux.


Once at a boil, add cream. Add mixture to dutch oven. Add cheese and simmer for 20 more mins. I let mine simmer for the first 20 mins then put it on low and let it simmer for a few more hours.

Tada!!!


For the cornucopias, I got the idea from the blog Makelifedelicious.  These are super simple and create a really cute presentation.  When we took them in last week, the Principal stopped us and took a pic of our little creations.  Needless to say, they were a huge hit!

Sugar Cone Cornucopias:
 
To start, in a deep saucepan, bring 2" of water to a boil.  Place a steamer on top.  Drop a few cones in at a time (otherwise they will steam faster than you can reform them).  Cover and let it sit for a minute or until the cones become pliable.
 
 
Take one cone out a time.  With a wooden spoon, curl the tip of the cone around the spoon and let cool for a few seconds until it holds its form.  You also may have to reshape the top of the cone back into a circle.  Place on a cookie sheet to cool.
 
 
Once you have made all your cornucopias and they have cooled, fill them with chocolate candies (like M&M's) or a candy mix.  To wrap them up, cut a piece of plastic wrap and then secure with ribbon of your choice.  Told you it was easy!

Friday, October 26, 2012

Bakin' Bacon in the Oven!!!!

The only smell better in the morning than coffee is the smell of bacon!  I love the smoky, fatty smell.  I love bacon!!! If bacon wouldn't take years off my life, I would eat it every day.  Oh, and I HATE the mess it makes.  Grease splattered everywhere....well it just sucks!  I loathe cleaning up after a big breakfast because bacon grease seems to spray from one corner of the kitchen to the other.  Sad thing is, my little man loves bacon as much as his mama does. If you ask him what he wants for breakfast, he will list of the smorgasbord he craves....like I am Waffle House or something.  This "order" always includes bacon!   So, I suck it up and make a big breakfast once a week.  Now, let me let you in on a little secret about cooking bacon.  I have heard in passing you can "fry" bacon in the oven.  What?!?!  Will it taste just as good as when it is fried in the cast iron skillet?  Hold onto your shorts, girls...IT DOES!  Who'd a thought, right?  This has to be one of the best and worst discoveries I have made!!!  Best being I can make it all the time without the clean up and worst is I can make it all the time!  You are not going to believe how easy and yummy this is!

Preheat the oven to 375 degrees.  On a cookie sheet lined with aluminum foil, lay your bacon out side by side. 

Slap those suckers in the oven for 15-18 minutes (I cooked mine for 17.5 minutes).  When you first pull them out, they may not look crispy enough.  They are.

 
Let them cool on a paper towel to absorb the excess grease.  When you are ready to devour this beautiful sight, they will be ready and waiting to make you slap happy! 
 
Now go grab you a pound, and getting to baking that bacon!  There is about to be a bacon shortage.  You don't want to miss out on this!
 
P.S.  Pour your leftover grease into a jar and stick in the fridge to use for beans and such later.  


Monday, October 22, 2012

Ho Ho Ho and it's only October!

Is it just me or does Christmas come earlier and earlier every year?  We are still days away from Halloween, but the stores have had Christmas stuff out for at least 3 weeks.  Crazy!  I guess I shouldn't judge these merchants.  You see, I already made a Christmas wreath (hanging my head in shame).  As a child, Christmas could never come soon enough.  Now that I am a parent, it seems to creep right up on me! 

Don't misunderstand me.  I LOVE Christmas!  It is my favorite holiday!  I love that you get to spend time with the ones you love....and there is great food during this season.  But what I also love about the season is the decorating!  I love wreaths, candles, big bows, decorated packages, snowflakes, deer, Christmas displays and lights.  Speaking of wreaths.  Since we married in 2005, we have had a different wreath on our door each year.  Maybe it's because I haven't found the perfect one, or I just like making a new one.  Like I have mentioned before, I am addicted to Pinterest.  Recently I saw pins that had a wreath made from rags (maybe burlap...I didn't click on the blog, just the picture).  It was made to look like Santa's belly and belt.  I loved it, but let's face it, I am not a rag kind of girl.  It's just not my thing, but I wanted a wreath like that Santa belly.

This year, my best girlfriend Tina started making wreaths.  She made the cutest Halloween and festive fall wreaths out of deco mesh.  Have you used this stuff?  It is a Christmas DIY'ers dream!  She gave me the run down on how to manipulate the material and turn it into a masterpiece!  She said if you can make a bow, you can make a wreath with deco!  I also jumped on YouTube and watched several how to videos.  So, I am going to be the sweet girl that I am and save you the time watching all these sweet ladies craft away.  Below you will find a quick and easy way to make those beautiful full mesh wreaths.  It took me about 45 minutes total.  The one that I made is a simple design that can be built upon.  So, tuck the kiddos in bed, grab you a glass of wine and get your wreath making on!

What you need:
  • 1 14" Styrofoam wreath (mine was pale green)
  • 1 21" x 10 yd. roll of deco mesh, red
  • 1 12" x 10 yd. roll of deco mesh, black
  • 1 sheet of glitter foam in gold (I got mine at Michael's.  I think it was 8x10)
  • 1 package of floral pins
  • Gorilla glue or hot glue gun
OK, here we go:

  • Take your red mesh and gather the free end of the roll.  With scissors cut the frayed edges off.  Bundle the clean edge and pin to the back of the Styrofoam wreath.  Secure it tightly.  You will want to start toward the inside of your wreath form.  We are going to make an inside and out run around the wreath.
  • Move your hand down the mesh about 12" from where you made your first pin.  Gather and secure it to your wreath form about 3" from your last pin.  You should get a nice fluffy "loop". 
  • You will continue around the wreath.  Once you have made a full turn around the wreath, don't cut the mesh, just move to the outside of your wreath form.  I used the whole roll of red mesh.
  • Once you have completed securing your red mesh, set it to the side.  It should look something like this...  

  •  Next, pour yourself another glass of wine and check on the little ones.
  • OK, grab your black mesh.  This is going to be Santa's belt.  Unroll approximately 22-24".   I gently held it around the wreath to get my exact measurement.  It doesn't need to go all the way around; just long enough to be able to pin to the back of the wreath form..
  • Now that you have cut the length of your belt. Fold it in half width wise once, maybe twice depending on how wide you want the belt to be.  I am going to warn you.  It doesn't stay put easily.  I had to lay it out on my kitchen counter and hold it down with water jugs and wine boxes.   
  • Once you have it folded, bring in your red wreath and flip it over.  Take your floral pins and secure the belt to the back of your wreath.  I used two pins on each side.

  • For the buckle, measure your belt width and cut a square to fit the dimensions (also round the corners).  Next, I moved in about 1.5" and used a razor blade to cut the center square out.
  • Next, adhere your piece of cut foam to the center of your black belt.
  • Confession time....I didn't realize the foam was sticky underneath the backing (DON'T LAUGH!).  So, I used Gorilla Glue (and a dab or two from my hot glue gun) to stick it on the belt.  I don't know how secure the backing is, but I do know it's not going anywhere with my Gorilla Glue and hot glue gun!
Voila!  You now have a cute Santa Belly Wreath! Ho! Ho! Ho!

Sunday, October 21, 2012

For the love of dessert

I have to admit, I have a HUGE sweet tooth!  I love dessert!  My hubby....not so much.  There are a few desserts he will have a serving of.  Peach cobbler, banana pudding and my strawberry shortcake trifle.  Since we have yet to feel fall down here (it was 91 degrees yesterday), a strawberry treat sounded good.  So, strawberry shortcake trifle it was!  Hubs was home from the oilfield for the day, so I wanted to surprise him with something that he can't get off of a roach coach or at a corner store.  Sad to say, but that is the "gourmet food" a lot of the guys out there are treated to. 

Years ago, I came across a Paula Deen recipe for strawberry shortcake trifle.  It was 4th of July and the strawberries were picked fresh from Adam's Farm just down the road from Mama's house.  They have the best strawberries.  Don't ask me why...maybe it's the red Georgia clay, or maybe cause they are grown from my hometown!  Either way, they are wonderful!  This dessert has become my go-to 4th of July dessert.

I use Ms. Paula's recipe but tweaked it to our liking.  Either version is good...but I like mine best!  Ha!  Below is how I make it:


  • 1 large angel food cake
  • 1 (8-ounce) package cream cheese, softened
  • 1 (14-ounce) can sweetened condensed milk
  • 1 (12-ounce) container frozen whipped topping, thawed
  • 1 cup sugar
  • 3 tablespoons cornstarch
  • 3 tablespoons strawberry gelatin
  • 1 cup water
  • 1 lb container fresh strawberries, cut in quarters (or you can use frozen strawberries, defrosted)

Directions:

Slice cake, using a serrated knife, horizontally into 3 equal layers.
Mix together cream cheese, condensed milk, and whipped topping in a bowl; set aside.
In a medium saucepan, stir together sugar, cornstarch, and gelatin; add water. Cook stirring over medium heat until thick. Remove from heat and allow to cool completely. Fold in strawberries.

Let's put it together:

Tear 1 layer of cake into big pieces and lay in a trifle bowl. Top with a layer of strawberry glaze, followed by a layer of cream cheese whipped topping mixture. Repeat layering in this order for remaining cake, glaze and creamy topping. Top cake with a few sliced strawberries.  Refrigerate for a couple hours to let it set. 

This is a picture of the one I made the other night.  It is not my prettiest version but tasted just as good.  I tore my cake pieces too small (I made them bite-sized) and they were weighed down by the custard.


Warning:  This dish is rich and will have you going for seconds. 

Saturday, October 13, 2012

Comfort in a Casserole

Even though it is still in the 90's outside here in Corpus Christi, I have been craving fall foods.  Nothing is better than a bubbling casserole in the oven and the aroma filling the house.  I love to buy rotisserie chickens from the grocery store.  When my husband is gone, Little Man and I usually eat a quarter of it and then I bone the rest and freeze it for later.  It usually yields about 3 cups.  Yesterday I decided come hell or high water we are acting as if it is cooler weather.  So, I pulled out a bag of frozen rotisserie chicken and went to work.  At the end of last year, I was flipping through my Southern Living Magazine (January 2012) that had come in the mail (a mail highlight!).  There was a recipe for King Ranch Chicken Macaroni and Cheese....WHAT?!?!?!?  Hello, jackpot!!!!  Living 45 minutes from the King Ranch, you find King Ranch Chicken everywhere!  Now let's talk mac and cheese.  Is there a better comfort food out there besides mac & cheese.  No.  So, when I saw that they had combined the two, I knew it would be heaven on a plate.  The first time I made it I went by the book.  It was good.  I decided the second time around I would make a few changes....and make it mine. ;)  So, here is my version:

3 Tbs. butter
8 oz. pkg of cavatappi or your favorite short pasta
1 medium onion, diced
1 green pepper, diced
1 (8oz.) package Mexican Velveeta
3 cups rotisserie chicken chopped
1 can cream of celery soup
1/2-3/4 c sour cream
1 tsp. Chili Powder
1/2 tsp. Cumin
1 - 1 1/2 cups shredded Mexican cheese

Preheat oven to 350. Prepare pasta according to package
Meanwhile, melt butter in a large dutch oven over medium- medium high heat. Add onions and bell peppers and saute 5 minutes or until tender.
Stir in Mexican Velveeta, stirring constantly until cheese is melted.
Stir in soup, sour cream, chili powder, and cumin.


Add chicken and hot cooked pasta and mix together.
Spoon mixture into a greased casserole dish.
Sprinkle with shredded cheese


Bake at 350 for 25-30 minutes or until golden bubbly!


This is yummy and comforting.  You will love every bite that crosses your lips.  Don't worry about the extra calories.  It's fall after all!

Wednesday, October 10, 2012

My name is Stacy and I am a Pinterest addict

My name is Stacy and I am a Pinterest addict.  I am not sure what has come over me this last year. I keep pinning away all the projects I plan to do in the future.  I don't deny I have a creative side that rears its head every now and then, but it seems to be a permanent resident now. Now, don't get me wrong.  Mama always had some kind of hobby.  She is very creative and was the BEST room mom a kid could have.  Now in a world with Pinterest, she would have to fight hard for that title. 

It's no secret I like to drink wine.  OK, I really like wine.  It's something I inherited from my daddy's side of the family.  My uncle makes his own in the basement for crying out loud!  It's only natural I love the stuff.  I have to tell you a funny story.  I ran into the corner store with my little guy to get him a juice before a road trip.  As we walked toward the back of the store, we had to pass the wine display.  My sweet child looked up at me and so innocently asked if we were getting me my "juice" too.  Ha!  Now that makes you a little uncomfortable.  OK, back to Pinterest.  I collect wine corks.  I keep all of them.  I like to use them as a display in the kitchen, but now have found I can be crafty with the excess that I can't fit in my vases on the shelf.  I came across  a handful of pins with the idea to glue used corks onto a letter.  As any southern girl will tell you, we LOVE monograms!  We have been known to monogram anything we can get our hands on...sheets, towels, wine glasses.  You name it...we monogram it!  So as you can see, this had to be a great idea.  Let me share my new found craft:

What you need:
a flat wooden letter (I got mine at Michael's...don't forget your coupon).
80-100 corks (don't judge me)
hot glue gun

I didn't have a method or layout for my corks.  I "free handed" gluing them onto the letter.  Your final product should come out something like the picture below.


As you can see, it makes cute wall art out of something most people throw away.  So, not only are you crafty, you are saving the earth one bottle of wine at a time.  Cheers!

Sunday, October 7, 2012

Margaritas and Magnolias

Margaritas and magnolias are two of my favorite things.  A perfect world would be a huge backyard with towering magnolia trees and a swimmin' pool filled with margaritas!  C'mon now, you know you would forward your mail there if it was a reality!  I think the good Lord created these two wonderful things to bring joy to all southern girls.  There is nothing better than the smell of magnolias blooming except for maybe the smell of a lime squeezed into a big ol' margarita.  So, you Scentsy reps out there, let me know when you get a scent that smells like either of these.

We live in South Texas and there are no magnolia trees that I know of.  If you see one, let me know.  I miss them!  Coming from Georgia, they are everywhere.  I love the big white blooms and their waxy green leaves.  I am sure that when a person thinks of greenery from the south, they picture a beautiful magnolia bloom. 

I love to make a margarita but I do have a confession to make.  Jose Cuervo makes a pre-made margarita: Jose Cuervo Golden Margarita.  Now look, I have tasted margaritas everywhere.  I might even toot my own horn and say I am a self proclaimed connoisseur of margaritas.  This is the best bottled margarita I have found.  How great it this, no need to run to the liquor store, no need to pull all the bottles out to mix up our favorite libation.  Just open the fridge, grab the bottle and pour over ice.  As a super busy mama, this is FABULOUS!  Let me set the record straight, I am not hitting the bottle all the time, but I do enjoy my margaritas every once in awhile.  So should you. 

First Day

Day 1....or should I say Blog 1.  This is kind of like the first day at a new school.  So, let me introduce myself.  My name is Stacy Kay.  I am from a town outside of Atlanta by the name of Peachtree City.  It is a community in its own little bubble....think Stepford Wives meets the Truman Show while wheeling through life on a golf cart.  With that said, I love where I come from and it will always be home.  I am married to a full blooded Texan.  In fact, we moved to Texas for his job last July...another story for another day.  We were blessed to bring the cutest little man in our lives in 2008.  Jackson is 4 going on 40 and full of spunk. I am a stay at home mom taking classes working on my nursing degree.  If all this wasn't enough to keep me busy, I LOVE to cook and be creative. So, why not add a blog to my things to do.  :)

I hope by starting this blog I will bring a little southern hospitality to your life.  I love all things southern. From the food to the charm, I want to share it all with you.  So, pull up a chair and stay awhile.